Main Courses
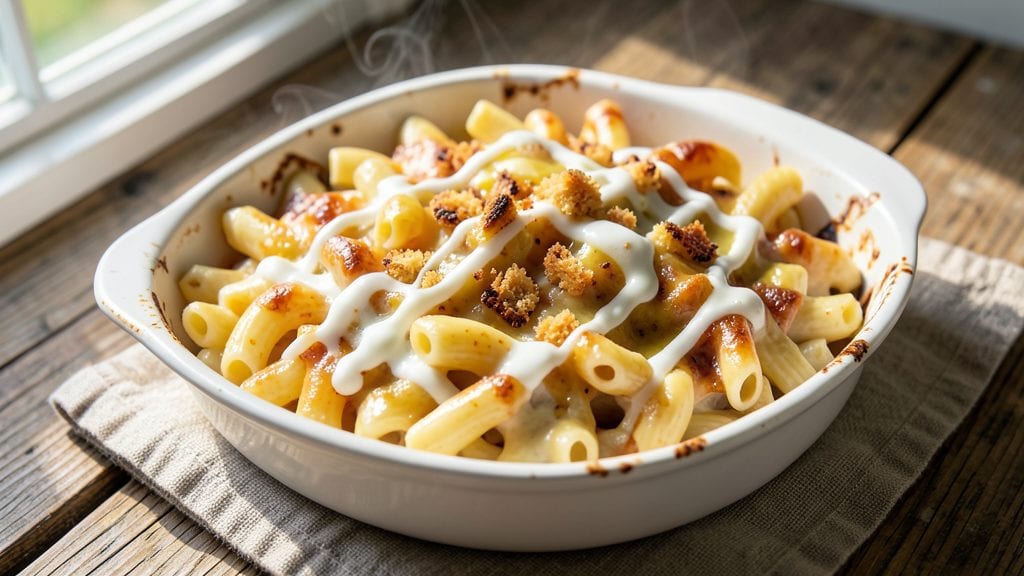
This mac and cheese recipe delivers the perfect combination of a crispy crust and melty swirls—all in one pot. After years of testing different methods, I’ve perfected a technique that ensures tender pasta, a rich cheese sauce, and that coveted golden-brown top layer.
The secret lies in the timing and temperature, which I’ve refined through countless batches in my test kitchen.
The beauty of this recipe is its simplicity—just a handful of ingredients transform into a comforting, restaurant-quality dish. You’ll start with elbow macaroni cooked to al dente perfection, then build a velvety cheese sauce using sharp cheddar, cream cheese, and a touch of mustard for depth.
The sauce is the heart of this dish, and I’ll show you how to achieve that signature creamy texture without lumps or separation.
By the time you’re done, you’ll have a crispy crust that shatters with every bite, while the inside remains tender and packed with those melty swirls of cheese. This is the kind of mac and cheese that disappears faster than you can say "comfort food."
The best part? It’s ready in under 45 minutes, making it ideal for weeknight dinners or Sunday family meals.
Once you master this one-pot technique, you can easily adapt it for baked mac and cheese by broiling it for a few minutes at the end. Whether you’re feeding a crowd or treating yourself to a cozy meal, this recipe delivers every time. Let’s get cooking!
Ingredients for mac.and.cheese
Just twelve ingredients for the ultimate creamy, crispy mac and cheese experience.
| Ingredient | Amount | Notes |
|---|---|---|
| Elbow Macaroni 🍝 | 12 oz | Uncooked, medium or elbow shape |
| Sharp White Cheddar Cheese 🧀 | 3 cups | Shredded, block preferred |
| Cream Cheese 🧈 | 8 oz | Full-fat, room temperature |
| Heavy Whipping Cream 🥛 | ½ cup | Full-fat for richness |
| Whole Milk 🥛 | ½ cup | Warm for smoother sauce |
| Yellow Mustard 🍯 | 1 tbsp | Dijon or whole grain |
| Unsalted Butter 🧈 | 4 tbsp | Cold, cubed for crust |
| Panko Breadcrumbs 🍞 | ¼ cup | For crispy topping |
| Garlic Powder 🧄 | ½ tsp | Freshly ground preferred |
| Salt 🧂 | 1 ½ tsp | Adjust to taste |
| Ground Black Pepper 🌶️ | ½ tsp | Freshly cracked |
| Freshly Grated Parmesan Cheese 🧀 | ¼ cup | For extra umami |
The cheese is where the magic happens. Sharp white cheddar gives that signature tang—none of that mild stuff. I grab the block and shred it myself (pre-shredded has anti-caking agents that make the sauce grainy). For the cream cheese, full-fat is non-negotiable—it's what makes the sauce velvety. The Parmigiano-Reggiano wedge at Whole Foods is my go-to for that extra umami punch. Pro tip: if you can't find sharp cheddar, mix mild cheddar with a little Monterey Jack for depth.
No panko? Crushed cornflakes or Ritz crackers work in a pinch for that crispy crust. Short on mustard? Dijon powder at half the amount gives similar tang. The butter needs to stay cold when topping—if it melts too fast, pop the whole pot in the freezer for 10 minutes before adding the crust. For the pasta, medium or elbow shape holds the sauce best (no tiny shells or giant rigatoni). And if you're feeling fancy, add a splash of white wine or apple cider to the sauce for extra richness—just reduce it first.
This reheats like a dream—just add a splash of milk to loosen it up. Keeps 4-5 days in the fridge, freezes for 3 months (though it's best fresh). I always double the crust recipe because extra crispy bits are life. Store leftovers covered with foil to keep that perfect texture. And if you're making it ahead? Assemble everything except the crust, refrigerate overnight, then bake straight from cold for even better flavor development.
Why You'll Love This Recipe
- No-Fuss Pasta Night: I swear, the only tools you need are a pot and a whisk. Toss in the elbow macaroni, melt the cheddar and cream cheese with milk and cream, then stir it all together—no fancy techniques, no stress.
- Creamy Sharp Bite: That sharp white cheddar? It’s the star. The cream cheese smooths it out just right, while the heavy cream keeps it luscious, but the cheddar’s tang cuts through—like a perfect balance of rich and tangy.
- Lunchbox Legend: Honestly, this is my go-to for meal prep. The sauce clings to the pasta, reheats beautifully, and even kids won’t complain. Pack it cold or warm, and it’s a hit every time.
- Budget Comfort: A bag of pasta, a block of cheese, and a few dollars for cream—this feeds four for under $10. Plus, leftovers? They’re even better the next day, crispy on top if you broil them.
Step-by-step instructions for crispy crust mac and cheese
Here's how to make the ultimate mac and cheese with a golden, crispy crust and gooey melty swirls—all in one pot.
Cook the Elbow Macaroni Al Dente
Bring a large pot of water to a rolling boil and add the 12 oz elbow macaroni. Cook for 1 minute less than the package instructions—you want it slightly underdone so it finishes cooking in the oven. Stir occasionally to prevent sticking.
While the pasta cooks, add 1.5 tsp salt to the water. The pasta should taste like the sea when fully cooked. Once al dente, drain the pasta but reserve 1 cup of pasta water—this starchy liquid is essential for creating a smooth, creamy sauce later. Don't rinse the pasta; the starch helps the cheese cling beautifully.
Create the Cheesy Sauce Base
In the same pot (no need to wipe it clean—the browned bits add flavor), reduce heat to medium and add 4 tbsp unsalted butter. Let it melt completely, then add 8 oz cream cheese, 3 cups sharp white cheddar cheese, and 0.5 cup heavy whipping cream. Stir constantly until the cheese melts completely and the mixture becomes smooth and creamy.
Here's the thing—if the mixture looks too thick, add 2-3 tablespoons of reserved pasta water at a time until it reaches a velvety consistency. You want it thick enough to coat the pasta but still pourable. Stir in 0.5 tsp garlic powder, 0.5 tsp ground black pepper, and 1 tbsp yellow mustard—this adds depth of flavor and prevents the sauce from becoming too heavy.
Combine Pasta and Sauce
Add the drained elbow macaroni to the pot and toss gently to coat each noodle evenly with the cheese sauce. The pasta should look glossy and fully enrobed. If it feels dry, add more reserved pasta water 1 tablespoon at a time until it reaches your desired creaminess. The sauce should cling to the pasta without being watery.
Transfer the entire mixture to a 9x9-inch baking dish and spread it out evenly. This ensures the top crust will crisp perfectly. Preheat your oven to 375°F while you prepare the topping—don't skip this step, as the crust depends on a hot oven.
Prepare the Crispy Topping
In a small bowl, combine 0.25 cup panko breadcrumbs, 0.25 cup freshly grated parmesan cheese, and 0.5 tsp salt. Mix until evenly distributed. This topping is what gives your mac and cheese that irresistible crispy crust—don't skip the salt, as it enhances the flavor.
Sprinkle the breadcrumb mixture evenly over the top of the mac and cheese, pressing down gently with the back of a spoon. This ensures good contact with the cheese, which will create that perfect golden-brown crust. For extra richness, dot the top with any remaining unsalted butter from the pot.
Bake to Crispy Perfection
Place the baking dish on the center rack of your 375°F oven and bake for 20-25 minutes. You're looking for a deep golden brown crust on top that's crispy to the touch. If the top browns too quickly, tent loosely with foil to prevent burning while the center finishes cooking.
To check doneness, insert a knife into the center—it should come out clean, and the cheese should be fully melted with no cold spots. The edges should be slightly pulled away from the dish, indicating the crust has formed. Let it rest for 5 minutes before serving—this allows the crust to set and makes it easier to slice.
Pro Tips For Making Mac.And.Cheese
- STOP BOILING DRY PASTA: I learned this the hard way—overcooked elbow macaroni turns to mush in that creamy sauce. Pull it out when it’s just al dente (about 1 minute before package time), then finish cooking in the sauce. The residual heat will soften it perfectly without turning it to glue.
- GRATE CHEESE FRESH: Pre-shredded cheese has anti-caking agents that make your sauce grainy. Sharp white cheddar needs to melt smoothly, so grate it yourself using the large holes of a box grater. Skip the food processor—it packs the cheese too tightly, and you’ll regret it when the sauce separates.
- LOW AND SLOW: High heat makes cream cheese seize up like scrambled eggs. Start your cheese sauce on medium-low, stirring constantly, until it’s fully melted and thickened. Then, if you want extra richness, add a splash of whole milk to loosen it—just don’t rush it.
- SAVE TIME WITH A DOUBLE BOILER: If you’re nervous about burning the cream cheese, melt it off-heat in a heatproof bowl over a pot of simmering water. It melts evenly without curdling, and you can keep stirring the sauce on the stovetop while it comes together—no risk of scorching. (Yes, even if you’re impatient like me.)
Dietary considerations for this mac.and.cheese
Classic Gluten-Free Swap
If you need a gluten-free version, swap the elbow macaroni for gluten-free pasta—I recommend Barilla Gluten-Free Penne or Jovial Brown Rice Pasta. These hold up well to the cheese sauce and cook in about the same time as regular pasta.
Just be sure to cook them al dente and reserve extra pasta water, as gluten-free noodles tend to dry out faster. 🌾
Dairy-Free Delight
For a dairy-free twist, replace the cheddar and cream cheese with nutritional yeast (for cheesy flavor) and cashew cream (blend 1 cup soaked cashews with 1 cup water until smooth). Use dairy-free butter or coconut oil instead of butter, and swap heavy cream for coconut milk.
The texture will be creamier but still rich—just add a splash of lemon juice to brighten the flavor. 🥥
Protein-Packed Boost
Add chopped rotisserie chicken or crumbled bacon for extra protein. I like to cook 4 oz bacon until crispy, then crumble it into the sauce before combining with the pasta.
For a vegetarian option, stir in ½ cup cooked chickpeas or sautéed mushrooms at the end. These additions add heartiness without overpowering the cheesy goodness. 🍗
Lower-Carb Option
Cut carbs by using cauliflower rice instead of pasta—just cook it until tender, then mix with the cheese sauce. For a heartier texture, blend ½ cup cooked cauliflower into the sauce before combining with the pasta.
You’ll still get that creamy, cheesy experience with fewer carbs. Pair it with a side of roasted Brussels sprouts for a balanced meal. 🥦
Allergy-Friendly Adjustments
For nut allergies, use sunflower seed butter instead of cashew cream in the dairy-free version. If mustard is off-limits, replace it with 1 tsp apple cider vinegar** for tang.
Always check labels on pre-shredded cheese—some brands add dairy derivatives that might trigger sensitivities. When in doubt, shred your own cheese for full control. 🧀
Nutrition facts
Frequently asked questions
Why does my cheese sauce get grainy?
Grainy sauce usually means too much moisture or pre-shredded cheese with anti-caking agents. Always shred your own block cheese and use reserved pasta water sparingly—just enough to loosen the sauce. Also, make sure your cream cheese is fully melted before combining with other cheeses.
Can I make this ahead of time?
Assemble everything except the crust, refrigerate overnight, then bake straight from cold. The flavors meld beautifully, and the crust will still crisp up perfectly. For parties, make it 24 hours ahead—it reheats like a dream.
What's the best way to reheat leftovers?
Add a splash of milk or water to loosen the sauce, then cover and heat in the microwave for 1-2 minutes. For crispier results, transfer to a baking dish, cover with foil, and bake at 350°F for 15 minutes. The crust won't be as crispy as fresh, but it'll still be delicious.
How do I make it extra crispy?
For maximum crunch, press the breadcrumb topping firmly into the cheese and add an extra layer of butter on top before baking. Broil for the last 2-3 minutes at 400°F to get that restaurant-quality golden crust. Just watch it closely—it burns fast!
Can I use other cheeses?
Yes! For a smoky flavor, add ½ cup smoked gouda to the mix. For a sharper taste, swap ½ cup of cheddar for Monterey Jack. The key is balancing sharp and mild cheeses—never use all mild cheddar, or the sauce will taste bland.